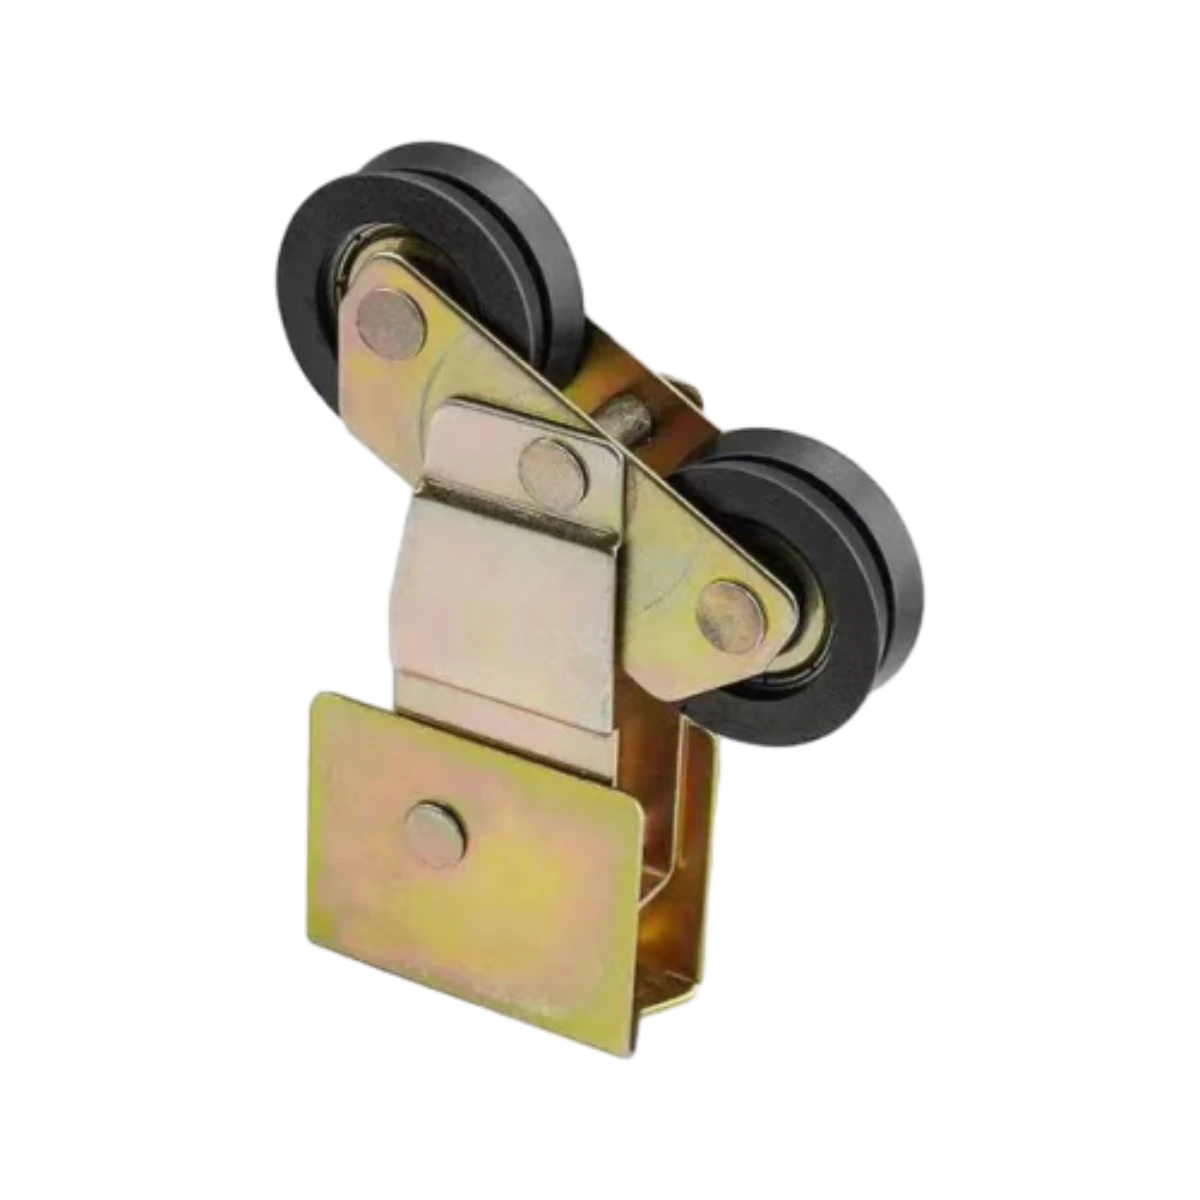
adjusting sliding door wheels
Adjusting Sliding Door Wheels A Step-by-Step Guide
Sliding doors are a popular choice for many homeowners due to their space-saving design and ease of use. However, over time, the wheels of these doors can become misaligned or worn, leading to difficulties in opening and closing. Fortunately, adjusting sliding door wheels is a straightforward process that can enhance the functionality and extend the life of your sliding doors. Below, we outline a step-by-step guide for adjusting sliding door wheels.
Tools You’ll Need
Before starting the adjustment process, gather the following tools
- A screwdriver (usually a flathead or Phillips, depending on the door) - A level - Lubricant (like WD-40 or silicone spray) - A vacuum cleaner or brush (for cleaning)
Step 1 Inspect the Door
First, thoroughly inspect the sliding door to identify any visible issues. Look for signs of wear or damage on the wheels and tracks. Check if the door is sticking or if it tilts to one side when opening and closing. Taking note of these issues will help you identify the necessary adjustments to make.
Step 2 Clean the Track
Dirt and debris can accumulate in the track, obstructing the wheels and making it difficult to slide the door smoothly. Use a vacuum cleaner with a brush attachment or a small brush to clean the track thoroughly. Removing any buildup will allow the wheels to operate more freely.
Step 3 Access the Wheels
adjusting sliding door wheels

To adjust the wheels, you may need to remove the sliding door from its tracks. This is typically done by lifting the door upward and tilting it outwards. Ensure you have someone to assist you, as sliding doors can be heavy and unwieldy. Once the door is removed, inspect the wheels for damage or wear.
Step 4 Adjust the Wheels
Most sliding doors have adjustable wheels that can be raised or lowered using a screwdriver. Look for adjustment screws on the underside of the door. Turn these screws clockwise to raise the wheel or counterclockwise to lower it. Adjust each wheel until the door is level and moves smoothly on the track. Using a level can help ensure that the door is properly aligned.
Step 5 Lubricate the Wheels and Track
After adjusting the wheels, it’s essential to lubricate them and the track to ensure smooth operation. Apply a small amount of lubricant to the wheels and run the door back and forth a few times to help distribute the lubricant evenly. Avoid over-lubricating, as excess lubricant can attract dirt and debris.
Step 6 Reinstall the Door
Once you’ve made the necessary adjustments and lubricated the wheels, it’s time to reinstall the door. Align the top of the door with the track and lift it back into place, ensuring that the wheels fit securely in the track. Test the door to ensure it opens and closes smoothly.
Conclusion
Adjusting sliding door wheels is a simple yet effective way to maintain your door's functionality. By following these steps, you can ensure your sliding door operates smoothly and efficiently for years to come. Regular maintenance, including cleaning and lubrication, will help prevent future issues and keep your door in optimal condition.
-
Why Choose TJJ as Your Window and Door Hardware Manufacturer?NewsOct.28,2024
-
The Advantages of Cast Iron Stove Plates: A Timeless Choice for Your KitchenNewsOct.28,2024
-
Aluminium Windows Profiles: Benefits and FeaturesNewsOct.28,2024
-
Innovations in Cast Iron Panel TechnologyNewsOct.28,2024
-
The Benefits of Customizing Your Wrought Iron Fence PartsNewsOct.28,2024
-
The Immortal Legacy of Cast Iron Spears: From War to Decorative UseNewsOct.21,2024
-
 Why Choose TJJ as Your Window and Door Hardware Manufacturer?Oct-28-2024Why Choose TJJ as Your Window and Door Hardware Manufacturer?
 -
 The Advantages of Cast Iron Stove Plates: A Timeless Choice for Your KitchenOct-28-2024The Advantages of Cast Iron Stove Plates: A Timeless Choice for Your Kitchen
 -
 Aluminium Windows Profiles: Benefits and FeaturesOct-28-2024Aluminium Windows Profiles: Benefits and Features


