Sliding Screen Roller Replacement | Expert Guide & Tips
Sliding Screen Roller Replacement A Step-by-Step Guide
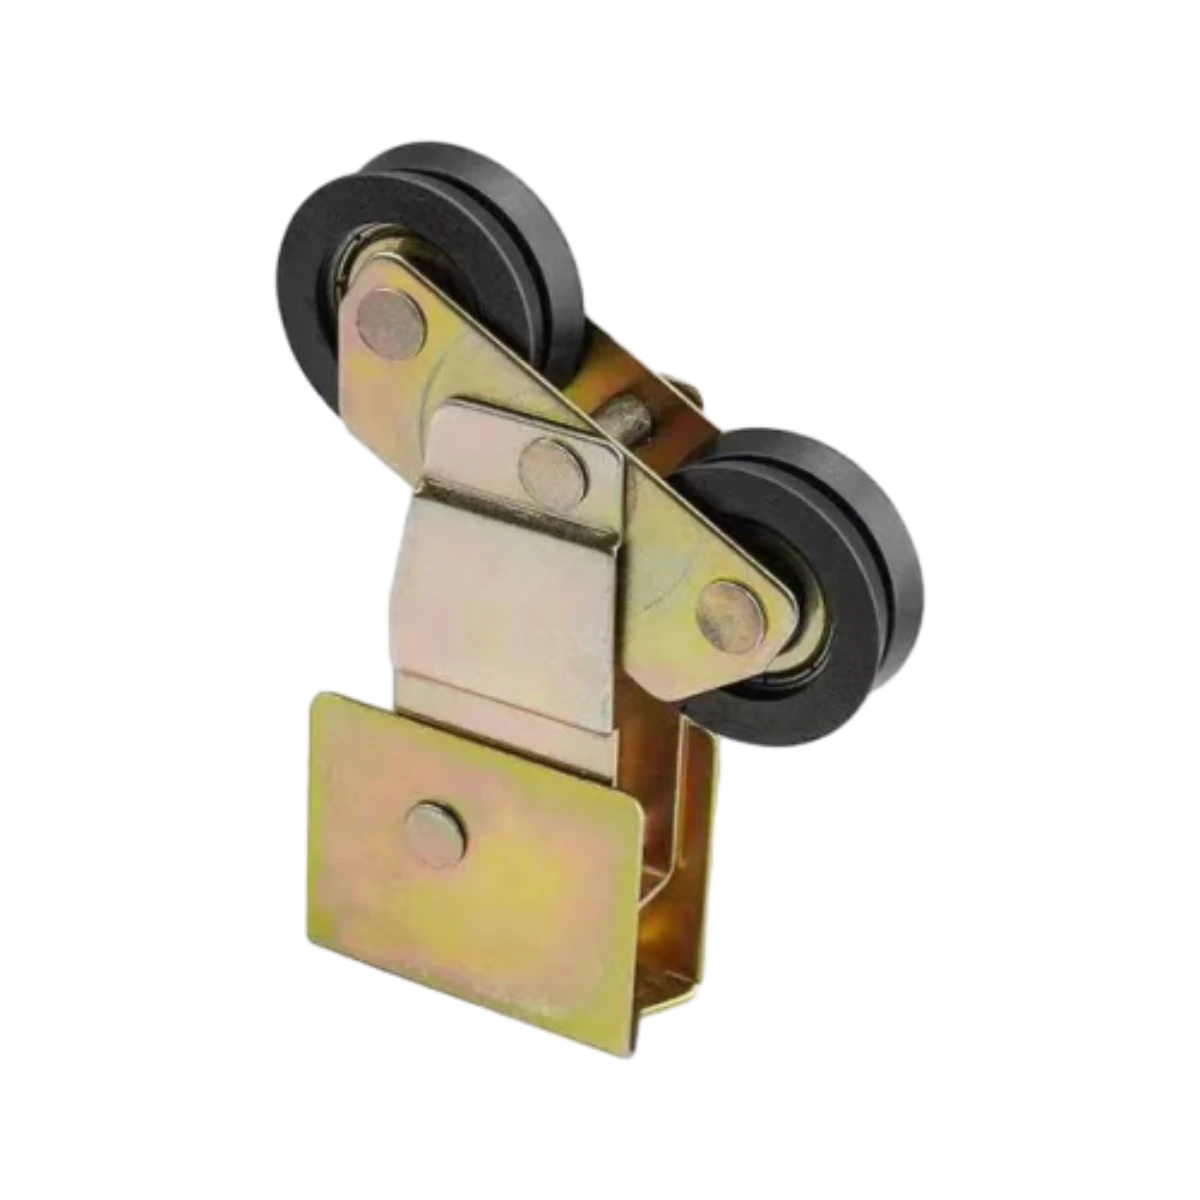
Sliding screen doors are a great addition to any home, allowing fresh air and natural light to flow in while keeping bugs at bay. However, over time, these doors can suffer wear and tear, particularly in the rollers that enable them to slide smoothly. If you've noticed that your sliding screen door is not gliding as effortlessly as it used to, it might be time for a roller replacement. Here’s a guide on how to replace the rollers effectively and efficiently.
Tools and Materials Needed
Before diving into the replacement process, gather the necessary tools and materials. You will need
- A new set of screen door rollers (make sure to purchase the right size for your door) - A screwdriver (usually Phillips or flat-head, depending on your screws) - A utility knife - A measuring tape - A level (optional, but helpful for ensuring the door is balanced) - A vacuum or broom (to clean the area around the door)
Step 1 Remove the Screen Door
Begin by carefully removing the sliding screen door from its track. To do this, lift the door slightly and pull it towards you, angling it at the bottom. Depending on your door, you may need to tilt the top towards you while pulling out the bottom. If the door is heavy, it may help to have someone assist you.
Step 2 Inspect the Existing Rollers
Once the door is removed, inspect the existing rollers for damage. Look for signs of wear, corrosion, or breakage. This will help you to confirm that replacement is indeed necessary. Additionally, take note of how the rollers are installed, as this will guide you in reinstalling the new ones.
Step 3 Remove the Old Rollers
sliding screen roller replacement

Using your screwdriver, remove the screws that hold the old rollers in place. If necessary, use a utility knife to cut any excess adhesive or sealant around the rollers. Once the screws are out, gently pull the old rollers off the door frame. Be careful not to damage the framework while doing this.
Step 4 Install the New Rollers
Take your new rollers and position them in the same location as the old ones. Secure them in place with the screws you previously removed. Ensure that they are tightened adequately but be cautious not to overtighten, as this could lead to misalignment.
Step 5 Replace the Door
With the new rollers in place, it’s time to rehang the sliding screen door. Align the rollers with the track and lift the door back into position. Once in place, check that it slides smoothly along the track.
Step 6 Final Adjustments
If your screen door is not sliding properly, consider adjusting the roller height. Most rollers come with adjustment screws that can be turned to raise or lower the door, ensuring it fits snugly in the frame.
Conclusion
Replacing the rollers on your sliding screen door can restore its functionality and extend its lifespan. This DIY project is manageable for most homeowners and can save you the cost of hiring a professional. With a little patience and the right tools, you'll have your sliding screen door gliding like new in no time!
-
Why Choose TJJ as Your Window and Door Hardware Manufacturer?NewsOct.28,2024
-
The Advantages of Cast Iron Stove Plates: A Timeless Choice for Your KitchenNewsOct.28,2024
-
Aluminium Windows Profiles: Benefits and FeaturesNewsOct.28,2024
-
Innovations in Cast Iron Panel TechnologyNewsOct.28,2024
-
The Benefits of Customizing Your Wrought Iron Fence PartsNewsOct.28,2024
-
The Immortal Legacy of Cast Iron Spears: From War to Decorative UseNewsOct.21,2024
-
 Why Choose TJJ as Your Window and Door Hardware Manufacturer?Oct-28-2024Why Choose TJJ as Your Window and Door Hardware Manufacturer?
 -
 The Advantages of Cast Iron Stove Plates: A Timeless Choice for Your KitchenOct-28-2024The Advantages of Cast Iron Stove Plates: A Timeless Choice for Your Kitchen
 -
 Aluminium Windows Profiles: Benefits and FeaturesOct-28-2024Aluminium Windows Profiles: Benefits and Features


