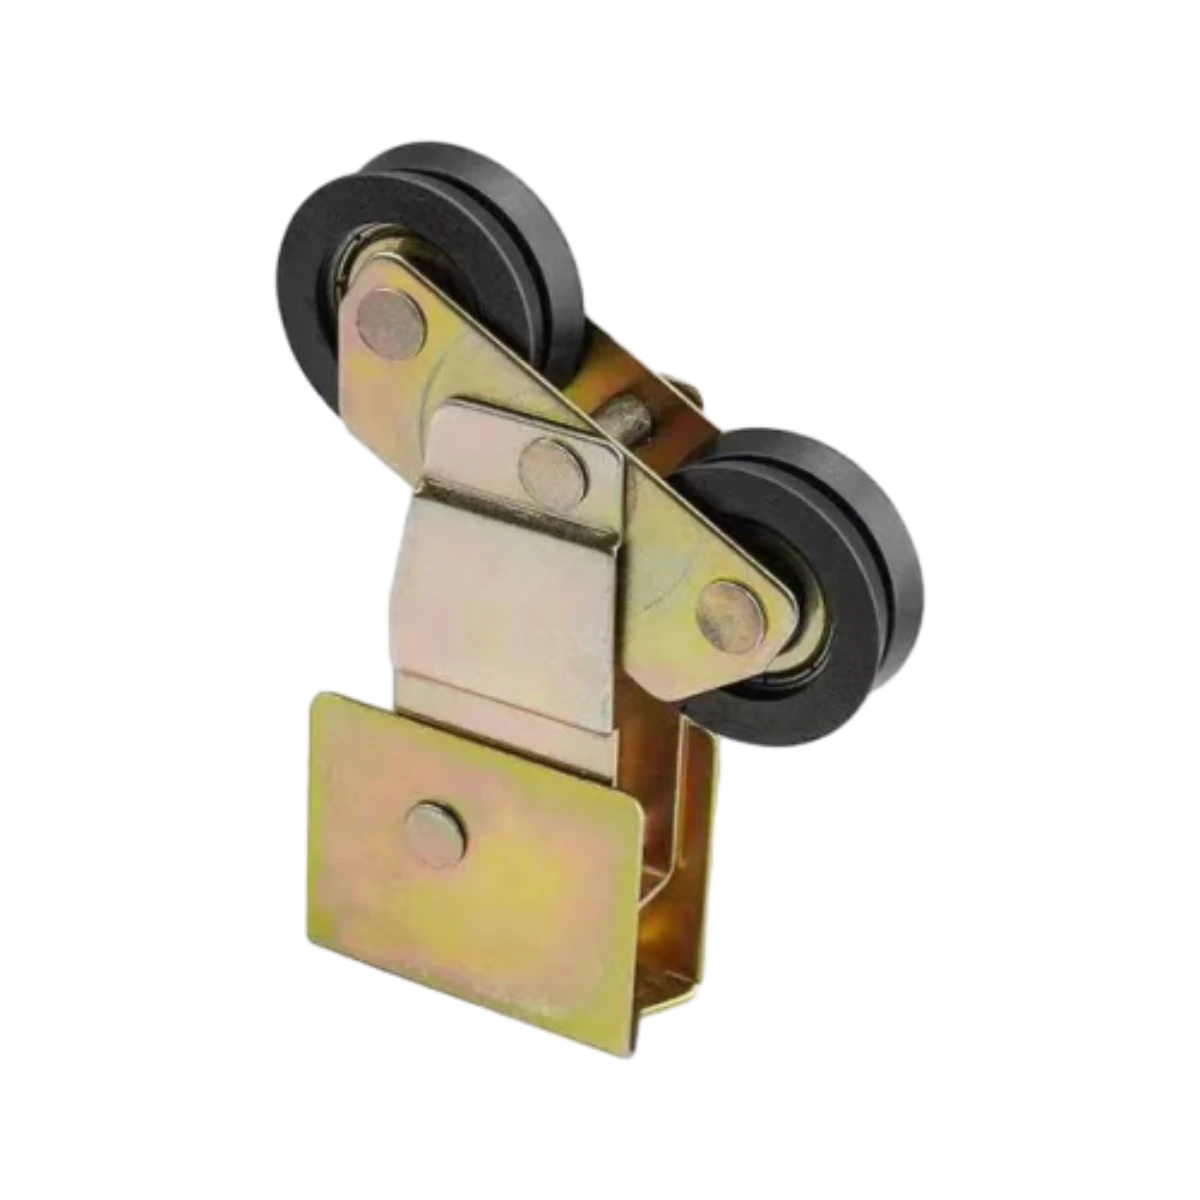
sliding door roller replacement
Sliding Door Roller Replacement A Step-by-Step Guide
Sliding doors are a popular choice for patios, closets, and room dividers due to their space-saving design and aesthetic appeal. Over time, however, the rollers that allow these doors to glide smoothly can become worn out or damaged, leading to frustrating operation or complete door failure. Replacing the rollers might seem daunting, but with the right tools and guidance, it can be a straightforward DIY project. This article will guide you through the process of sliding door roller replacement.
Understanding the Problem
Before diving into the replacement, it's essential to diagnose the issue. If your sliding door is difficult to open, sticks, or jumps off the track, the rollers are likely the culprit. Inspect them closely for signs of wear, rust, or damage. If they appear broken or excessively worn down, it’s time for a replacement.
Tools and Materials Required
To replace the sliding door rollers, you'll need
- A flathead screwdriver - A Phillips screwdriver - A wrench or pliers - Replacement rollers (specific to your door model) - A step ladder (if applicable) - WD-40 or similar lubricant (optional)
Step-by-Step Replacement Process
1. Preparation Before starting, clear the area around the door to ensure you have enough space to work. Remove any decorations or obstacles that may hinder the process.
sliding door roller replacement

2. Remove the Door Most sliding doors can be lifted out of their tracks. To do this, locate the adjustment screws at the bottom of the door. Use the appropriate screwdriver to lower the rollers, which should allow you to lift the door out. Make sure to ask for assistance if the door is heavy or difficult to maneuver.
3. Inspect and Remove Old Rollers Once the door is removed, flip it over so you can access the bottom edge where the rollers are located. Carefully unscrew the old rollers and take them out. Pay attention to how they are installed; this information will be useful for putting in the new ones.
4. Install New Rollers Take your new rollers and position them in the same manner as the old ones. Secure them with screws, ensuring they are tight and stable.
5. Reposition the Door With the new rollers in place, lift the door back into the track. Adjust the rollers as needed using the adjustment screws to ensure the door hangs level and glides smoothly.
6. Test the Door Open and close the sliding door several times to ensure everything operates correctly. If it sticks or doesn’t glide as expected, make further adjustments to the roller screws.
7. Final Touches If necessary, apply a lubricant such as WD-40 to the track and rollers for smoother operation.
Conclusion
Replacing sliding door rollers is a cost-effective way to restore functionality to your door and enhance the overall usability of your space. By following these straightforward steps, you can complete the task efficiently and enjoy a smoothly operating sliding door once again. Remember, regular maintenance can prolong the life of your sliding doors and their components.
-
Why Choose TJJ as Your Window and Door Hardware Manufacturer?NewsOct.28,2024
-
The Advantages of Cast Iron Stove Plates: A Timeless Choice for Your KitchenNewsOct.28,2024
-
Aluminium Windows Profiles: Benefits and FeaturesNewsOct.28,2024
-
Innovations in Cast Iron Panel TechnologyNewsOct.28,2024
-
The Benefits of Customizing Your Wrought Iron Fence PartsNewsOct.28,2024
-
The Immortal Legacy of Cast Iron Spears: From War to Decorative UseNewsOct.21,2024
-
 Why Choose TJJ as Your Window and Door Hardware Manufacturer?Oct-28-2024Why Choose TJJ as Your Window and Door Hardware Manufacturer?
 -
 The Advantages of Cast Iron Stove Plates: A Timeless Choice for Your KitchenOct-28-2024The Advantages of Cast Iron Stove Plates: A Timeless Choice for Your Kitchen
 -
 Aluminium Windows Profiles: Benefits and FeaturesOct-28-2024Aluminium Windows Profiles: Benefits and Features


